Good morning! Would you believe I had this window open all day yesterday, and never got the post up? Things are slowly coming together at the LaClair house-my elves started wrapping gifts last night...that was a great relief-plus, it kept the elves out of my hair while I was baking!
I was very productive yesterday, got a LOT of baking done, as well as many other loose ends...including getting photos taken of my other trees!
Here is tree number 2--this one is up in our bedroom, in the dormer. I have always liked these white trees, they seem kind of retro to me, and it goes in our bedroom perfectly with all the blue and white...it is blindingly bright at night, with white lights ON the white tree...I have strictly blue and white decorations on it--I found some great snowflakes at Michaels this year to add. Here is tree number 3. This is a new addition this year--I got it for Cody to put in his room. He barely has any decorations on it--if you look closely you can see Homer Simpson hanging on for dear life as the topper!! He has M&M lights of different colors on his tree.
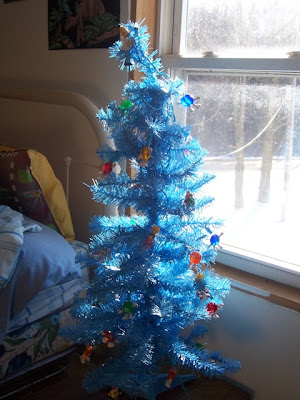 This is tree number 4. This is also a new addition this year. I have accumulated MANY John Deere ornaments over the years. Mom let me use this extra smaller tree she had, and I added solid green, and solid yellow strands of lights. I also made some green and yellow star ornaments, and some baling twine wreaths. Topped it off with the hat! It looks really cool in the dark!!

So that is it! I will try to get trees 5 and 6 posted later today, or tomorrow! Have a great day!
**Keri**
Wednesday, December 23, 2009
Trees 2, 3, and 4!
Friday, February 13, 2009
Happy Valentine's Day 2009!
Happy Friday Morning, everyone! Just in case I am more sick tomorrow than I am today, I thought I would get this up and posted NOW instead of waiting! These are pics of the Valentines I made for my lovees, and the towels I made for my dear friend Judy. She drives Cody to school most days and I like to do something special for her on Holidays. I USUALLY make her chocolate covered potato chips, but since she is doing Weight Watchers, I was warned to not make her any sweets!
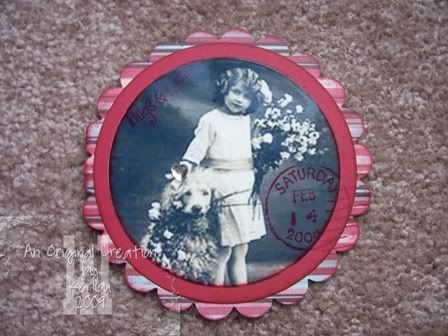
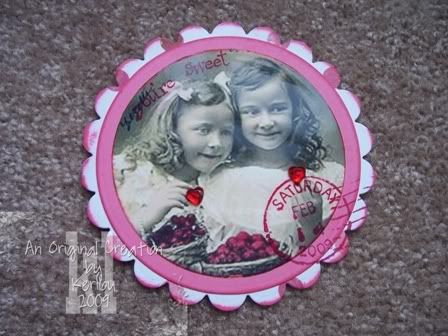
I made a dozen cards this year, three different designs, and several different patterns of paper. I printed the vintage photos off the internet, and cut them, and the whole card out, using Nestabilities dies in my Cuttlebug.
The postage cancellation stamp is from Purple Onion Designs, as are all the sentiment stamps that I stamped on the photos. Ink pad is Red Staz On. The rhinestones are Martha Stewart adhesive backed.
The finished size is about 4.25 x4.25"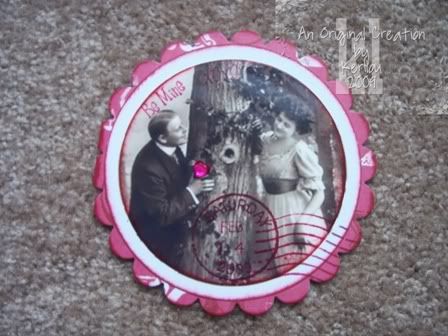
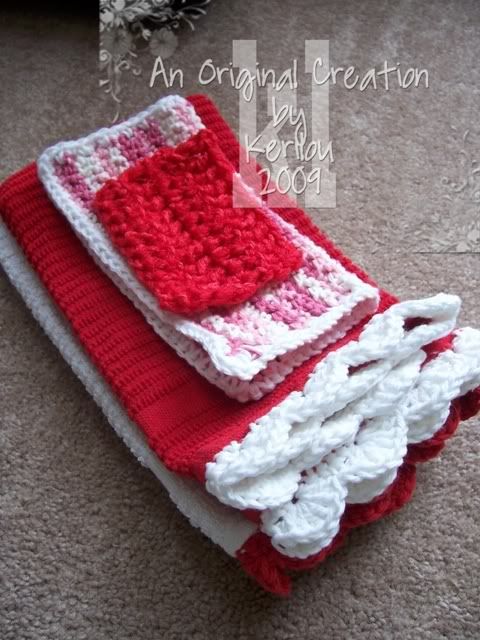
Now, this is the grand idea I had for my friend Judy. I wanted to crochet edging on towels for Valentine's Day, for her kitchen. I got a pack of 4 towels at Walmart. 2 red and 2 white. Lisa Renea found me this fairly simple pattern for edging, and after some guidance from the gals at 2peas Leisure board, I figured out how to crochet the edging directly ON the towel's edge. I did a blanket stitch on the inside edges of the towels, then crocheted onto that. It turned out pretty good for my first time! She *LOVED* them, so that was the main thing! I also made her a pink and white dishcloth, and a red pot scrubber, to complete the set. I have been making the scrubbers for a while, but recently changed my "formula" and now they are even better. More sturdy, prettier, etc. I crochet them with one strip of nylon mesh, and one strand of plastic canvas yarn, which is VERY rough yarn. I also stuck in a box of 10 calorie Oreo Cakesters for her to munch on. They are SO GOOD!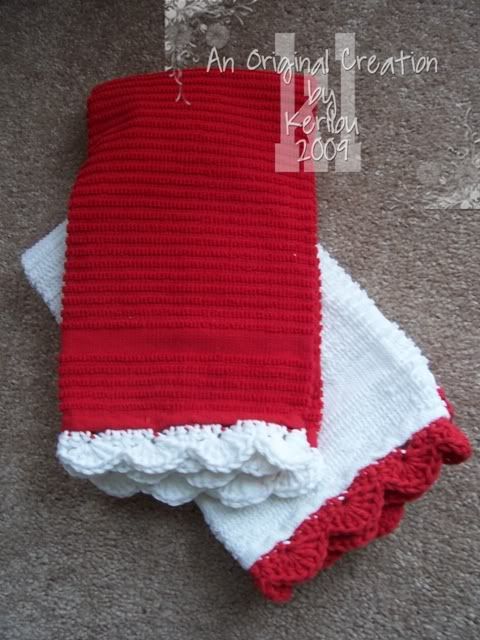
So, there you have it! My daycare kids all leave at noon today, and Cody is gone to Vermont on a field trip til 4, so I am headed to town to find him a Valentine's Day present. I am also going to get some stuff for a Valentine's Day pizza supper tomorrow, and probably something sweet for dessert! Thanks for all the well wishes, Cody is doing much better, and only missed that one day of school. I am under the weather, but not enough to keep me down. Mamas can't be sick!!
Have a great day!!
**Keri**
Friday, December 26, 2008
Secret Sister, 2008!
Good morning? I trust everyone survived yesterday? I hope everyone had an enjoyable holiday. Ours was wonderful! Busy, hectic, but wonderful!
One of my favorite parts of the day was finally getting to open my Secret Sister gift! I belong to a private, online group of about 20 women-all stampers, scrapbookers, and paper artists extraordinaire! We have been together for I believe 6 or 7 years now. Every Christmas, we draw names for Secret Sister! Well, my box arrived almost 2 weeks ago, with strict instructions to wait until Christmas! We all agreed to take photos to share with each other, of how pretty the packages were presented, as well as what the contents were. Here is my box-as it looked when I got it-well, not opened, but you know what I mean!
Here is my favorite gift, a piece of altered art of my initial! I *LOVE* it! I am going to hang it in my craft room!!  Here is a pic of the rest of my goodies-patterned paper, chipboard, stickers, stickles, Nestabilities, and a QK Squeeze with a complete alphabet and some other dies!! I was completely spoiled!!
 My Secret Sister was Lisa Renea, and you can go visit her blog if you click HERE. Thanks, LR for helping make my Christmas a most memorable one! Your generosity and kindness do not go un- noticed!
**Look for more goodies I rec'd yesterday, in more posts over the next few days!!**
Tuesday, December 23, 2008
Christmas Decorations, Part II
 This is our family tree, in our livingroom. It is another artificial one, 7.5 feet tall. We put multi colored lights on this one, and it is laden with everything and anything you can imagine, from Hallmark ornaments to cartoon characters, to German Stars and ornaments Peter and I had as children. I keep saying that it is not possible to add another ornament to it, and I always end up putting more new ones on, every year! The first photo is of the tree, in the dark, with the lights plugged in. Not the greatest pic, but you get the idea!
The topper for this tree is a Boyd's Bear, dressed as a Santa, and he hugs the tree top. I think if I add one more ornament, the tree may tip over! Due to the maniac dogs, it is wired to the wall. I put it on the ledge, between the livingroom, and the porch, so I can decorate *almost* all the way around. We can see it from both rooms that way, too~! The lattice work barricade you see in the background is puppy confinement! She has managed to break two windows in her short life, and sometimes we need a
break!! I hope you like all my trees, I hope to be back with a few more photos tomorrow!
**Keri**

Sunday, December 21, 2008
Holiday Decorating, Part I

Hello, everyone, and welcome to my virtual tour of Holiday decorations!! I went around the house yesterday, and took a bunch of pictures in the daylight, then went back and took some in the dark, with the Christmas lights turned on. This is only a portion of the decorations, I plan on returning these next few days with more-it is WAYYY too much for one post! This first tree is a 4 foot one, in our kitchen. It has c7 bulbs on it, and it holds all the ornaments from my Grandmother, and Peter's grandmother. The very fragile, antique glass ones?? Yeah, those.
Here it is, in the dark...
 Here is a look into my Christmas village. Doesn't it feel like you are right there?? I love my village-I got all the pieces unfinished, plain white, and painted them. I added a couple each year, and now have a large collection!

I keep my village on our antique kitchen cupboard. I *love* my cupboard! It hold dry goods in the top, and various stuff like shoes, plastic bags, and placemats and tablecloths in the bottom.  This is a closeup of the adirondack woodsy kind of tree we have in the trophy room. I got the cute little mittens off ebay, and I added a lot of rusty ornaments, bells, grapevine wreaths, pip berries, and bows. It has many, many pinecones and white lights on it, too!
Here is what it looks like in the daytime: And here is what it looks like in the dark! Brodie was sniffing the presents, cause I wrapped her doggie treats yesterday!!
I hope you like my tour so far! There is more to come, so make sure to visit again soon!
Have a great week!
**Keri**
Wednesday, December 17, 2008
Silent Night, Holy Night...
I thought I would share this very peaceful photo I took, of Harley and our big tree last week. The tree is 9 feet tall, and Harley weighs 130 pounds, just so you have some perspective! When the tree gets put up, she immediately takes residence next to it. I can't put my finger on exactly why, but she lays next to it, almost under it, sits by it, looks at it, you name it. I hope to get a few more pictures of our decorations posted in the week to come. We are expecting three more storms in the next week (we just got 6 more inches last night) so I should have plenty of time! Things are going well here, I am not READY for the holidays, but I am keeping up, so that is a blessing! Have a great evening!
**Keri**
Sunday, December 07, 2008
Christmas Wreaths
 Good Sunday morning! Well, after visiting two of my regular blogs this week, I decided it was high time I took that artificial wreath off my door, go out back and cut some branches, and make myself a real wreath! I always used to either buy a real one, or make one, but have gotten lazy these past few years. Go HERE and HERE for the blogs responsible! My friend Peg came over yesterday, with her wreath frame, and we took TWO HOURS to make two wreaths. I am very out of practice! They are HUGE, as we used 18" frames. Thanks to both Tanya and Judy for great tutorials and tips on how to do this. It really helped refresh my memory! It was a nice time, we got to visit, and worked while we did. The first wreath is mine, with it's aqua/white/blue bow and sprayed white pinecones. The second one is Peggy's with a sparkley red bow, pine cones, and
  berries! They turned out awesome! What a deal, just 3 bucks for the frame, and a bit of labor and here we have a great huge wreath that would have cost a small fortune! We also got together to make some more of those snowman head ornaments out of the model magic. We had a great afternoon of crafting and visiting. Thanks for coming, Peggy! Well, I am hoping to get the last of the decorating done today, then I will be in clean up mode. I have been very productive these last few days, and don't want to lose my ambition! Have a great day!
**Keri**
Monday, December 01, 2008
Christmas Time Is Here!!
Good morning everyone! I pray that everyone had a splendid Thanksgiving break?! Hard to believe that it is over already. I could cry. I am sitting here lacking so much sleep that my stomach feels sick, and the whole left side of my rib cage has pulled muscles in it, from lifting and tugging on heavy stuff. Hopefully today it will subside and I can sleep tonight!
We had a great few days off. I kept busy, that is for sure. I am probably a bit behind on dishes and laundry, but that is what Monday is for, right?
I have a ton of stuff saved up to share with you, so it should be a busy week! I revamped the blog for the holidays-quite a change from fall, huh? I like the soft colors!
The first thing I have to share with you today, are these adorable snowman ornaments I made last week. I got the idea from Jennifers Blog, SIMPLE FLOURISHES {{Click Here}} I tweaked them to make them more "me" by adding more ribbon on the loop, glittering them, and adding a mouth to some of them. I also "stained" the noses with a rust color, on top of the orange color, and wiped it clean, to leave the noses with darker creases. I used 2 inch foam balls, and I got 5 ornaments out of one package of the model magic. I love Jennifer's blog, and her great idea! My friend Peggy and I plan to make more on Saturday!!
 This is a rusty jingle bell wreath. I got the grand idea after seeing something similar in an online catalog, that I should get the bells and make one for my friend for her birthday. I have a great resource for all things rusty-StreetCarJunction on ebay. Let me just say these aren't the bells that LOOK rusty, and are just painted brown. These actually ARE rusty. I love the wreath, don't get me wrong, but making them can get a bit messy!! I actually made 2 of these, it was a "one for you, one for me" scenario. The evergreen branch is actually artificial-but it looks so real! Each ~12 inch wreath contains 72 jingle bells in 3 sizes, then 1 more large one hanging in the center. It was a trial and error process, but I finally figured out which method looked the best as a finished product. I strung the bells one by one, in a pattern of large, med, small, and they all nested nicely and I fastened the wire at the ends to make a circle. Add the hanging bell, the bow, and the branches with some fine wire, and there you have it! Really simple, really cute! There are all kinds of bells out there, too. I just like anything that looks old.
  So, drop me a line, tell me what you think of my new look!
I plan on blog hopping today to get caught up.
Have a great Monday!
**Keri**
Monday, November 17, 2008
Christmas Ornaments..
I found THIS GREAT LINK last week for a really cute Christmas tree ornament.
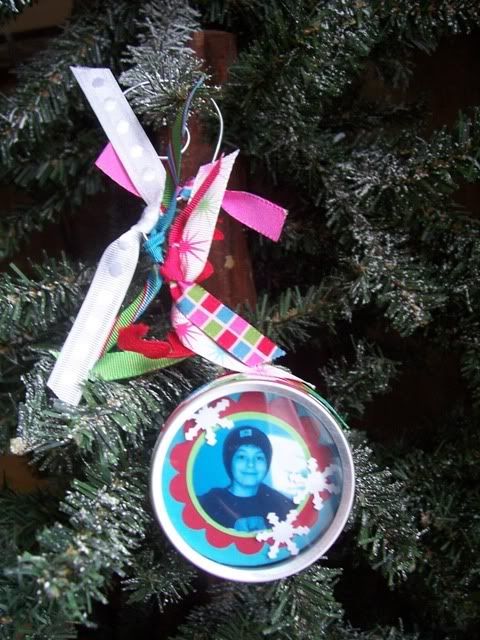
Would you believe I had everything to make a couple?? Here is my interpretation of the ornament. The more colorful one is more like the original from the link, the blue/black/white/silver one is more "me" with different wire and some beads added to it. I used SU! scalloped circle and circle punches for the inside, and even added some chunky glitter and snowflake punches to the inside!! One photo is printed in black and white, the other one I gave a turquoise tint to. They really were fun to do, and I am anxious to do some more, of our two dogs!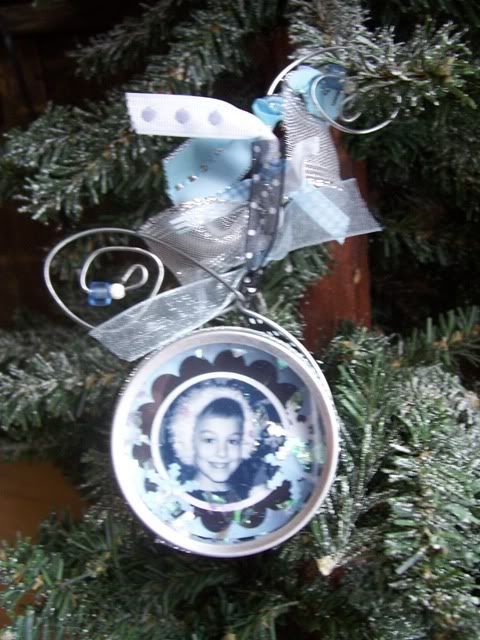
I have been having trouble uploading photos through blogger lately, so I have been using photobucket. Sorry it the photos are too large, or not clear. I guess I need to sit down and figure out what is going on!
Hope you like these ornaments, and thanks for visiting!!
Have a great day!
**Keri**
Sunday, August 24, 2008
My New Craft Room.....
Well, my summer project is finally done, without much time to spare! This room is downstairs is our house. When my Grandma (Omi) lived here, this was her bedroom. When we bought the house and moved in, Cody was 3, so at first it held a lot of boxes, then it was turned into his playroom. He literally *never* used it to play in. It more like STORED his toys. He would go in, make a huge mess, find what he wanted and take it out to the livingroom to play with. Then I would bug him for days or weeks to pick up his toys, and put them away. When he would, they would land in a pile, and I would bi-annually dig this room out and re organize. Well, needless to say, I had had ENOUGH! As soon as school was out, I started sorting, and moving things out. The crib that I had for daycare was given back to my Mom, and the toys were sorted and moved to their temporary home in the livingroom. I intended to store what Cody still wanted to keep out, in the room I used as a craft room upstairs, but it was still full of my scrap stuff until we got this room all painted and ready to move into. See my quandry? So after camp, I finally buckled down, and got the rest of the room emptied out. All those tiny little pieces and parts, packaging, scrap paper, broken crayons, etc. What a mess!! Peter then painted the remaining walls white (we had already painted one with chalkboard paint, and some white years ago) and I was responsible for painting the shelving and bins. Needless to say, I should be kept AWAY from the paint. I have never been a good, or neat painter. I can paint the spots on a ladybug, but can't paint the broad side of a barn. Seriously. Peter painted several walls and didn't get a spot of paint on him. I had painted for 5 minutes and I was covered!
I finally got everything back in order, and moved my supplies down on Friday. I always called my room upstairs, the Scrap Cave. I gotta say, I think I need a new name, cause this room is much roomier, and a lot brighter! I sorted out a lot of stuff that I no longer wanted, and now everything is clean, and organized in my new area! Let me take you on a tour::
This is the little jut-out wall that faces you as you enter. The artwork is center stage, a gift from my lovely cyber-friend, Annie. I am so excited to be able to display this in a nice area, not surrounded by turkey tails...(don't ask)
 As you walk in past the jut out, you see the two closets. (hence the jut) One is for coats, one is extra storage for me! It has several shelves in it.
  This is the chalkboard wall that I decided to keep from when Cody had the room. Peter helped me put up a few things, but I can still write on it if need be.
  The entertainment center was Omi's. It is made to fit in a corner. I put some photos and past creations on top of it. And of course, my work station under the window!
 Another corner....
 This is the shelving unit Peter built for Cody's toys back in the day. It was raw plywood, but I painted it white. Turned out good!
 These are in infamous ink pad holders my uncle made me to mimic the DVD holders everyone was getting at Ikea. He made me 10, so I still have room to grow!
 A closer look at the shelves. My SU! stamps have more room, the crates are cardstock, and down at the bottom, the crates are filled with all my Purple Onion and Buzz and Bloom goodies! I know, nothing matches, but I don't care!!
 My workstation...Peter brought this table home from a job site just after we were married. The place was getting rid of it. *HE* thought it would be great for meat cutting during hunting season. SHEYA...
 Here is my card rack from last years yard sale. It had been in my upstairs hallway. Now it has a home!
 My ribbon shelves, made out of old rain gutter scraps.
  Here is a shot of the floor. This floor downstairs, and the whole upstairs, are these original 1910 wide boards. Give it some character!
  So, that is a tour! Bits and pieces from here and there, but I love how it came out. I am thinking about stamping a few butterflies on the walls. Thanks for looking and sharing in my excitement!!
Keri
Thursday, February 21, 2008
A birthday card and some final renovation photos...
 Hello! Hope everyone had a good Thursday! I finally got Cody back home! Since we have been on vacation this week, Cody has been off visiting and "hanging out" with friends and cousins all week! I picked him up from a friend's house today, and we went to Pa and Nana Brooks' for the afternoon. By the time we got home, Peter was right behind us! But one good thing is this: It is still daylight until almost 6 pm these days! We had a great view of the lunar eclipse last night...It was a very clear, and therefore, very cold!
I have been asked to make my first birthday cake for someone-semi professionally, I would
 say! I can hold my own, and the cakes are awesome tasting, but I am almost completely self taught...So that is what tomorrow holds for me. I will be making a birthday cake! You can watch for the results tomorrow! Speaking of birthdays, I made a card today, geared towards the male persuasion..I am always trying to keep up with my stash of more "manly man" birthday cards. This one uses a stamp set that I had gotten off the retiring list from SU! a couple years ago. I *think* this is the first time I had stamped with it! I used SCS Sketch Challenge #19 ( I think!). The set is Wild Fowl, the cardstock is SU! True Thyme, Handsome Hunter and Very Vanilla. Ink
  is
is Now, after much procrastinating, I am finally showing you the finished product of our new family room...***If you do not like dead animal heads and they freak you out, do NOT click on the photos and make them larger!!*** That is the official disclaimer!!
The first two photos are of the back wall, the "wall of fame" so to speak. One is from the landing, one is from floor level looking up. Peter's pride and joy! You can also see the barn beams, the chandelier, and the textured ceiling Peter did!

This is a close up of the border I stamped on two of the walls, using the SU! DD set Pines. It was a bit of a trial/error process, but it looks great now that it is done!
One photo is of the new stairway Peter put in, using antique barn beams as treads. It was a lot of work and figuring, but it was worth it! They are awesome!
The rest of the photos are just different angles of the room, either from the floor, or from the landing coming out of the kitchen . I apologize for the disarray of the photos...I was too lazy to fix them. You can click on them to make them larger, I think! Talk later! keri




.jpg)


