
A couple of months ago, I posted an altered notebook that a friend had made me for my birthday. I loved it! I keep it by my computer, and have designated the sections for certain things. Websites, wishlists, To-do's, etc. Well, I finally got a spiral notebook punch of my own, and decided to take a stab at altering one of these notebooks. I went to Michael's and got an assortment of spiral bound notebooks in different shapes and sizes. I found them in the dollar bins where you find the pocket calendars and coloring books and such. The price is right! I am finding that I like the Mary Engelbreit 5x7 notebooks the best. The punched holes line up perfectly, and the fit is not too tight. The only thing is, these notebooks have patterns on them, so when you cover them with paper, the pattern shows through on the edges. I tried to sand the edges down, but the printed pattern is pretty stubborn, so I opted to paint the edges with acrylic paint that coordinated with the patterned paper I was going to use. Sometimes I do the painting before adding the paper, sometimes after, for a distressed look. It is all personal preference. Out of the three I am showing you today, one I did not paint because the pattern matched the paper I was using, the other two I painted AFTER I added the paper, to get a distressed look. Here goes: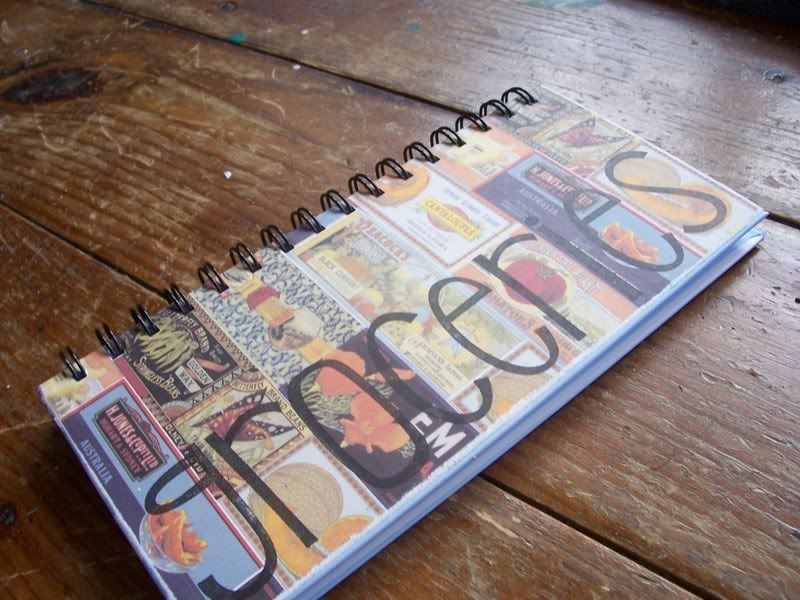
This one is the one I did not paint. The notebook was pale blue and white, and it matched the patterned paper (vintage fruit labels) that I had chosen. You start out by cutting your patterned paper the same size as the cover of your notebook. Then you take the spiral notebook punch, and punch it along the side that will be on the spine of the notebook. The punch has a small notch that aligns the holes so that they are automatically at equal intervals. Then you just place the paper onto the spiral wire, and it should lay flat over the cover. Once you know that it is a proper fit, you can adhere it. I use Mono Multi Liquid Glue. I have experimented with several different adhesives, an this is the one that I find works the best. I also lightly sanded the covers of the notebook to get a better grip with the glue. I just applyed the glue to the cover, with the paper already on the spiral, and laid the paper down. I put little dots of glue up into the little sections between spirals, too.....does that make sense? I used a bone folder to make sure the bond was good, and there were no bubbles. After the covers where both papered and dried, I lightly sanded the edges with sand paper for a more finished look. I used SU! Tall Tales Alphabet and black ink to stamp the word Groceries along one side, and now I have a new grocery notebook. I didn't add any embellishments, mainly because this will get a lot of wear and tear, and I wanted to keep it as simple as possible!
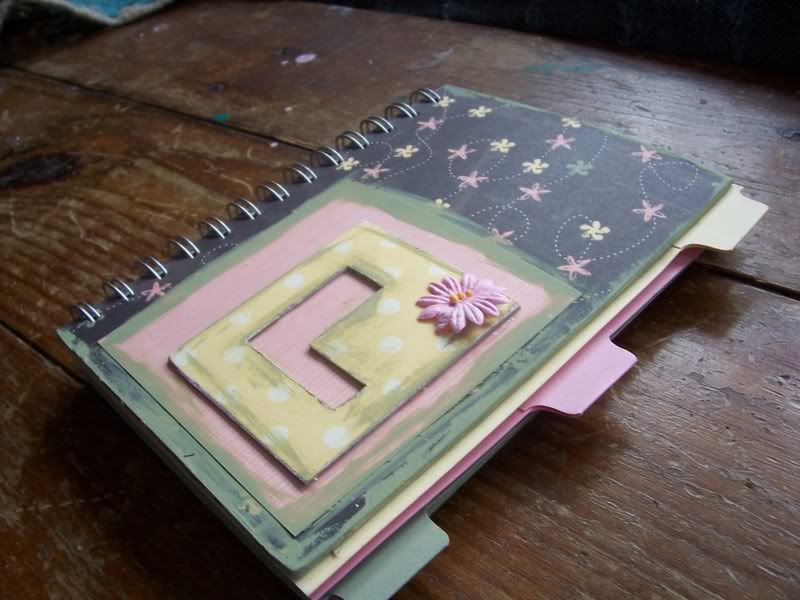 This one I made for my cousin Lauri for her birthday last month. I used the Mary E. 5x7" notebook, and added dividers. The dividers are cut the same size as the cover, and I added an index tab using SU!'s new tab punch. I did the cover the exact same way as the previous notebook, but added a chipboard monogram and a paper flower. I distressed everything with a complimentary color of acrylic paint using a foam brush. I used SU! Patterned Paper, and SU ! cardstock in Pretty in Pink, Mellow Moss, and Barely Banana! The chipboard monogram is from Making Memories.
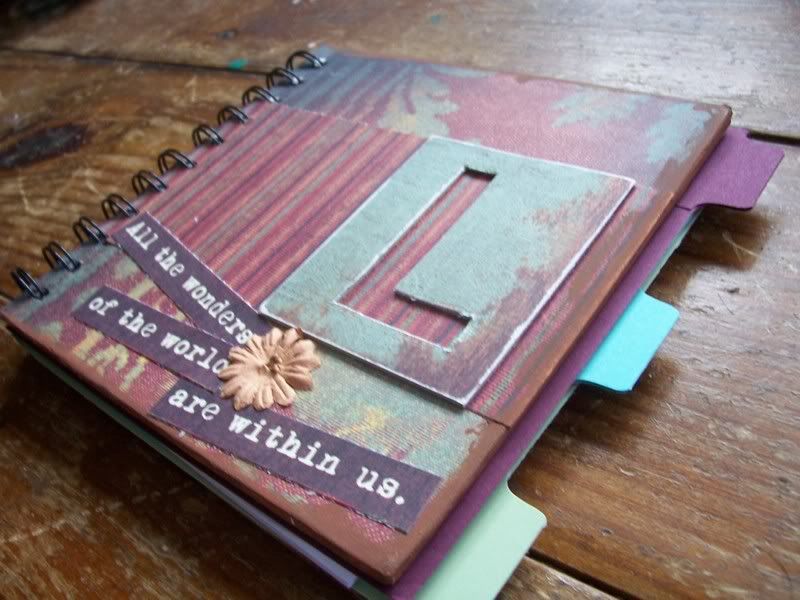 For the last one, which I made my cousin Lisa for her birthday, I used pretty much the same techniques. This notebook is a 6x6. I used Cosmo Cricket Journeys patterned paper, and embellished with a quote, a paper flower, and a chipboard monogram. I did tabbed inserts again, and distressed the notebook with brown acrylic paint. Monogram is from Joann's Essentials.
I am so pleased with how these turned out. They are so much fun to make, and make really great gifts. I am thinking I may make a few for my son's teachers as end of the year teacher presents...better get started! --Keri


.jpg)


4 comments:
This is lovely and I liked your tutorial. Thanks for sharing. And your puppy is soooo cute.
these are so nice. i bet your giftees were quite pleased :-) so funny you are posting this. i've had making some little books on the brain for a while - i finally got the binditall and i'm hoping to make some soon! good inspiration!
What a great project!!!
Very good tutorial. Need to get those bargain notebooks. Have the spiral and tab. Aren't they just fab.
Post a Comment